RTA Guide/A-Maze-ing Emergency Exit: Difference between revisions
Shoutplenty (talk | contribs) (→Right Side: tip + comparison to other strat) |
Shoutplenty (talk | contribs) (added beginner left-side strat) |
||
| Line 7: | Line 7: | ||
'''A-Maze-ing Emergency Exit''' is the fifth mission of [[RTA Guide/Hazy Maze Cave|Hazy Maze Cave]]. | '''A-Maze-ing Emergency Exit''' is the fifth mission of [[RTA Guide/Hazy Maze Cave|Hazy Maze Cave]]. | ||
== | ==Beginner== | ||
=== Left Side (Triple Jump Wallkick) === | ===Left Side (Triple Jump Wallkick)=== | ||
=== Right Side === | ====Tips==== | ||
# Press C-right early during the fade-in; if your camera faces further left than in the example then you pressed it too late. | |||
# Hold Z to chain each long jump as soon as you land the last one. | |||
# We do some camera inputs to set up the camera in the next room: R + C-down during one of the long jumps, then C-right ''just before'' opening the door. The later you press C-right, the more the camera will turn (which makes things easier), but you can't press it after the door opens. Find a timing you're comfortable with, perhaps using Mario running past floor textures as a visual cue. | |||
# Just hold up and triple jump; wiggle up-left during the double jump to give yourself more space. | |||
# Simultaneous Z + A will give you the lowest possible ground-pound for a fast star grab. | |||
'''Backup for ledge-grab during the double jump:''' get up and long jump over to the right to do [[RTA Guide/Watch for Rolling Rocks|Watch for Rolling Rocks]] instead. | |||
====Demo==== | |||
{{#ev:youtube|CfnYfM3gKww}} | |||
==Intermediate == | |||
===Left Side (Triple Jump Wallkick)=== | |||
This strat has the advantage of needing to hold only up until after the triple jump. To set this up, you must press C-right within a few frames before opening the door. | |||
{{#ev:youtube|zKVrG3iYjlo}} | |||
===Right Side === | |||
This strat is optimally faster than left side, but its less-scripted nature means it tends to be slower and may be less consistent for you in practice (but your mileage may vary). | This strat is optimally faster than left side, but its less-scripted nature means it tends to be slower and may be less consistent for you in practice (but your mileage may vary). | ||
| Line 19: | Line 37: | ||
{{#ev:youtube|TR-ZYmXHF0s}} | {{#ev:youtube|TR-ZYmXHF0s}} | ||
== Expert == | ==Expert== | ||
''Known as the "singlestar strat" on the Ultimate Star (Xcam) sheet.'' | ''Known as the "singlestar strat" on the Ultimate Star (Xcam) sheet.'' | ||
Revision as of 05:25, 31 January 2024
| A-Maze-ing Emergency Exit | |

| |
| Record Information | |
| RTA World Record | 10.90 |
| Single Star World Record | 10.51 |
A-Maze-ing Emergency Exit is the fifth mission of Hazy Maze Cave.
Beginner
Left Side (Triple Jump Wallkick)
Tips
- Press C-right early during the fade-in; if your camera faces further left than in the example then you pressed it too late.
- Hold Z to chain each long jump as soon as you land the last one.
- We do some camera inputs to set up the camera in the next room: R + C-down during one of the long jumps, then C-right just before opening the door. The later you press C-right, the more the camera will turn (which makes things easier), but you can't press it after the door opens. Find a timing you're comfortable with, perhaps using Mario running past floor textures as a visual cue.
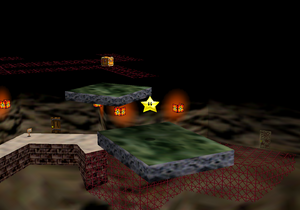
- Just hold up and triple jump; wiggle up-left during the double jump to give yourself more space.
- Simultaneous Z + A will give you the lowest possible ground-pound for a fast star grab.
Backup for ledge-grab during the double jump: get up and long jump over to the right to do Watch for Rolling Rocks instead.
Demo
Intermediate
Left Side (Triple Jump Wallkick)
This strat has the advantage of needing to hold only up until after the triple jump. To set this up, you must press C-right within a few frames before opening the door.
Right Side
This strat is optimally faster than left side, but its less-scripted nature means it tends to be slower and may be less consistent for you in practice (but your mileage may vary).
For the wall kick, run towards the wall with a fairly sharp angle of incidence, then initiate the buffered kick into double-jump, and start holding up immediately after the kick to strafe along the wall towards the platform. You can also run forwards a bit after entering the room to get the wall kick closer to the platform.
Expert
Known as the "singlestar strat" on the Ultimate Star (Xcam) sheet.
If Mario slides forward instead of rolling out, you were too far forward and must jump lower and delay your dive more.
| |||||||||||||||||||||||||||||||||||||||||||||||||||||||||||||||||