RTA Guide/Red-Hot Log Rolling: Difference between revisions
(added sidehop record) |
(add better sidehop advanced (jump dive) strat video) |
||
| (One intermediate revision by one other user not shown) | |||
| Line 31: | Line 31: | ||
==== Tutorial ==== | ==== Tutorial ==== | ||
{{#ev:youtube|iOENdUjwqZ0}} | |||
===Standard (2 Long Jump)=== | |||
{{#ev:youtube|j62JIByIh1Y}} | |||
===Advanced (Jump Dive)=== | ===Advanced (Jump Dive)=== | ||
{{#ev:youtube| | Saves ~0.2s ideally | ||
{{#ev:youtube|VwbDlb-oZH0}} | |||
====Alternative Camera==== | ====Alternative Camera==== | ||
Different angles during sidehop.{{#ev:youtube|bB3U34HISFM}} | Different angles during sidehop.{{#ev:youtube|bB3U34HISFM}} | ||
{{RTA Guide Nav}} | {{RTA Guide Nav}} | ||
Latest revision as of 08:17, 5 September 2025
| Red-Hot Log Rolling | |

| |
| Record Information | |
| RTA World Record | 10.80 (Wingcap) 12.23 (Sidehop) |
| Single Star World Record | 7.90 |
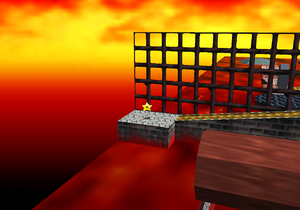
Red-Hot Log Rolling is the fourth mission of Lethal Lava Land. Using wing cap is faster and easier, but wing cap is unavailable in 16 Star, where sidehop strats are used.
Wing Cap
Beginner
Basic movement. To get safely over the wall, be sure to maximise the takeoff triple jump by holding forwards + A until entering flight, at which point tap down-right, then steer.
Advanced
Double-jump dive from the box platform (with lenient spacing), speed-kick to maintain speed into takeoff triple jump.
Expert
Moving backwards against camera, sideflip into box, triple-jump dive from the box platform (with tight spacing for rollout).
Easy Camera
Long-jump to box platform. During fade-in, press R asap, and hold down-left. When Mario lands, press C-down; continue tapping C-down during idle time to prevent the camera from swivelling. As soon as Mario starts moving, hold down; this setup ensures Mario hits the box. Drifting right during the box sideflip makes the triple-jump dive spacing more likely to reach.
Optimal Camera
Jump dive to box platform; requires timing the stick input to line up the camera.
No Wing Cap (Sidehop)
Tutorial
Standard (2 Long Jump)
Advanced (Jump Dive)
Saves ~0.2s ideally
Alternative Camera
Different angles during sidehop.
| |||||||||||||||||||||||||||||||||||||||||||||||||||||||||||||||||