RTA Guide/Wall Kicks Will Work: Difference between revisions
No edit summary |
No edit summary |
||
| (11 intermediate revisions by 4 users not shown) | |||
| Line 2: | Line 2: | ||
|title= Wall Kicks Will Work | |title= Wall Kicks Will Work | ||
|image= WKWW.png | |image= WKWW.png | ||
|rta_record=[https:// | |rta_record=[https://youtu.be/RNa7ckPGZjA 8.56] | ||
|ss_record=[https://www.youtube.com/watch?v= | |ss_record=[https://www.youtube.com/watch?v=aPPGewIj0lg 5.73] | ||
}} | }} | ||
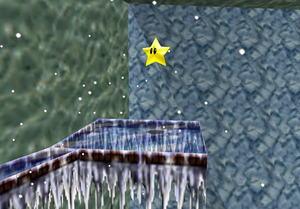
'''Wall Kicks Will Work''' is the sixth mission of [[RTA Guide/Cool, Cool Mountain|Cool, Cool Mountain]]. | '''Wall Kicks Will Work''' is the sixth mission of [[RTA Guide/Cool, Cool Mountain|Cool, Cool Mountain]]. | ||
== Beginner == | == Beginner == | ||
This movement skips the backflip wallkick movement. | This movement skips the backflip wallkick movement. Begin by holding the downleft notch and double jumping off the edge. Once you approach the middle level, c-left to have a better view of the bottom level. Kick before the ground to avoid fall damage. Alternatively, you could dive rollout instead of double jumping down, however this is arguably more difficult and slower than the intermediate strat. | ||
<div><ul> | <div><ul> | ||
<li style="display: inline-block; vertical-align: top;"> | <li style="display: inline-block; vertical-align: top;"> | ||
[[File:wkww beg.mp4|thumb| Jump Kick Down to the bottom ( | [[File:wkww beg.mp4|thumb| Jump Kick Down to the bottom ([https://youtu.be/_x14dg-__OY example vid w/ inputs]) |class=autoplay]] | ||
</li> | </li> | ||
</ul> | </ul> | ||
== Intermediate == | == Intermediate == | ||
Timing the wallkick after the backflip can be difficult due to the awkward camera angle. | Timing the wallkick after the backflip can be difficult due to the awkward camera angle. Mashing the A button after the backflip will ensure you wallkick but will make it so you don't reach the star platform. This movement loses 1-2s from the fastest strat. Mashing A+B will let you reach the top platform but you won't have much speed. This loses less than 1s to the pro strat. | ||
<div><ul> | <div><ul> | ||
<li style="display: inline-block; vertical-align: top;"> | <li style="display: inline-block; vertical-align: top;"> | ||
[[File:wkww spam a.mp4|thumb| Mashing A for the wall kick ( | [[File:wkww spam a.mp4|thumb| Mashing A for the wall kick ([https://youtu.be/ifnks93PjYU full video]) |class=autoplay]] | ||
</li> | </li> | ||
<li style="display: inline-block; vertical-align: top;"> | <li style="display: inline-block; vertical-align: top;"> | ||
[[File:wkww spam ab.mp4|thumb| Mashing A+B for the wall kick | [[File:wkww spam ab.mp4|thumb| Mashing A+B for the wall kick |class=autoplay]] | ||
</li> | </li> | ||
</ul> | </ul> | ||
== Advanced == | == Advanced == | ||
The camera used for this strat is largely based on preference. The Mario cam C-Left strat is a newer setup that's less used, but may give you a better visual for timing the wall kick. | |||
<div><ul> | <div><ul> | ||
<li style="display: inline-block; vertical-align: top;"> | <li style="display: inline-block; vertical-align: top;"> | ||
[[File:wkww pro.mp4|thumb| Standard Pro Strat ( | [[File:wkww pro.mp4|thumb| Standard Pro Strat ([https://youtu.be/PBGcvqH4Vdc example vid w/ inputs]) |class=autoplay]] | ||
</li> | </li> | ||
<li style="display: inline-block; vertical-align: top;"> | <li style="display: inline-block; vertical-align: top;"> | ||
[[File:wkww pro alt.mp4|thumb| Mario Cam C Left Cam |class=autoplay]] | [[File:wkww pro alt.mp4|thumb| Mario Cam C Left Cam ([https://youtu.be/mN02pQw3gc4 example vid w/ inputs]) |class=autoplay]] | ||
</li> | </li> | ||
</ul> | </ul> | ||
=== Backup === | === Backup === | ||
Diving into the bottom of the star by performing a small single jump can save quite a bit of time, but risks diving under and missing it. | Diving into the bottom of the star by performing a small single jump can save quite a bit of time, but risks diving under and missing it. | ||
<div><ul> | <div><ul> | ||
<li style="display: inline-block; vertical-align: top;"> | <li style="display: inline-block; vertical-align: top;"> | ||
[[File:Wkww miss star backup. | [[File:Wkww miss star backup.mp4|thumb|Easy backup for diving under the star| class=autoplay]] | ||
</li> | </li> | ||
</ul> | </ul> | ||
{{RTA Guide Nav}} | {{RTA Guide Nav}} | ||
Latest revision as of 19:53, 28 August 2022
| Wall Kicks Will Work | |

| |
| Record Information | |
| RTA World Record | 8.56 |
| Single Star World Record | 5.73 |
Wall Kicks Will Work is the sixth mission of Cool, Cool Mountain.
Beginner
This movement skips the backflip wallkick movement. Begin by holding the downleft notch and double jumping off the edge. Once you approach the middle level, c-left to have a better view of the bottom level. Kick before the ground to avoid fall damage. Alternatively, you could dive rollout instead of double jumping down, however this is arguably more difficult and slower than the intermediate strat.
-
Jump Kick Down to the bottom (example vid w/ inputs)
Intermediate
Timing the wallkick after the backflip can be difficult due to the awkward camera angle. Mashing the A button after the backflip will ensure you wallkick but will make it so you don't reach the star platform. This movement loses 1-2s from the fastest strat. Mashing A+B will let you reach the top platform but you won't have much speed. This loses less than 1s to the pro strat.
-
Mashing A for the wall kick (full video)
Advanced
The camera used for this strat is largely based on preference. The Mario cam C-Left strat is a newer setup that's less used, but may give you a better visual for timing the wall kick.
-
Standard Pro Strat (example vid w/ inputs)
-
Mario Cam C Left Cam (example vid w/ inputs)
Backup
Diving into the bottom of the star by performing a small single jump can save quite a bit of time, but risks diving under and missing it.
| |||||||||||||||||||||||||||||||||||||||||||||||||||||||||||||||||