The Castle
| The Castle | |
| |
| Course Info | |
| Terrain | Grassy/Default |
| Setting | Varied |
| Water | Some |
| Course Items | |
| Coins | 6 ( |
| Enemy Coins | 9 ( |
| Caps | |
| Star Navigation | |
| Overview | |
| |
| |
| |
| |
| |
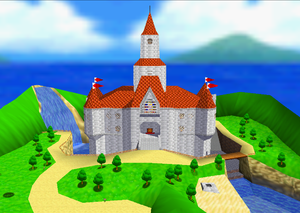
The Castle is the level containing the entrances to the majority of the other levels in Super Mario 64. It consists of the Castle Grounds, the Castle Lobby, and the Castle Courtyard.
Coins
Although the castle cannot save a coin score, it still has collectable coins. The maximum coin count that can be achieved in the castle in 999, by either exiting a level after getting 999 coins, or repeatedly collecting Castle coins and going out of the area and back in to respawn them. This list enumerates the unique coins that can be collected in the castle.
| Location | Count |
|---|---|
| (Outside the Castle) 2 yellow coins hidden underneath the bridge over moat | 2 |
| Total | 2 |
| Location | Count |
|---|---|
| (Inside the Castle) In the main entrance room, 2 pairs of coins beside the staircase | 4 |
| Total | 4 |
| Location | Count |
|---|---|
| (Castle Courtyard) 9 Boo Buddies (with yellow coins) | 9 |
| Total | 9 |
Areas
Castle Grounds
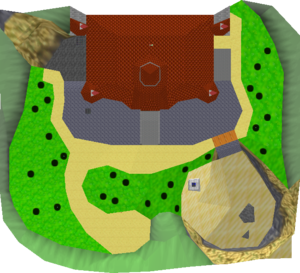
The castle grounds are the starting location when creating a new file, loading a previous file, or dying anywhere within the castle. It features a sunny environment with birds and water sound effects in the background. There is also a cannon next to the lake that unlocks at 120 stars, which is meant to allow you to get onto the castle roof. However, it can be bypassed with precise movement. On the roof, if you have 120 stars, Yoshi tries to maximize Mario's lives to 100. There is one secret stage on the castle grounds, Vanish Cap Under the Moat, which is usually entered by draining the most but can be entered by hyperspeed.
Castle Lobby
First Floor
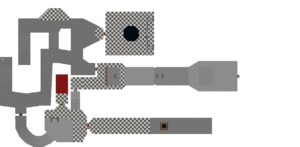
The first floor is the introductory area of the castle. It contains 4 main courses (Bob-omb Battlefield, Whomp's Fortress, Cool, Cool Mountain, and Jolly Roger Bay), and three secret courses (The Princess's Secret Slide, The Secret Aquarium, and Tower of the Wing Cap). The star door on this floor requires 8 stars to open and leads to Bowser in the Dark World, the first Bowser stage. The door can be skipped with an LBLJ, by HSWKing, or with speed conserved from Bob-omb Battlefield.[1][2] Additionally, there is a key door to the second floor, as well as one leading to the basement (the intended next area) and a regular warp door leading into the courtyard.
Basement
The basement has 4 main courses (Shifting Sand Land, Lethal Lava Land, Hazy Maze Cave, and Dire, Dire Docks). It also contains the pillars normally required to unlock Vanish Cap Under the Moat, although they can be bypassed with moat door skip. The star door in this area requires 30 stars which can be skipped with an SBLJ, and leads to the second Bowser stage, Bowser in the Fire Sea, and Dire, Dire Docks.
Second Floor
Just like the others, the second floor has 4 main courses (Tall, Tall Mountain, Wet Dry World, Snowman's Land and Tiny-Huge Island), along with a star door that requires 50 stars to enter, which leads to the third floor. The door can be skipped using BLJs or HSWKing.
Third Floor
The third floor contains 2 main courses, Tick Tock Clock and Rainbow Ride, along with one secret stage, Wing Mario over the Rainbow. Although there are "endless" stairs on this floor that require 70 stars to pass, they can easily be skipped using BLJs. These stairs lead to the final Bowser stage, Bowser in the Sky.
Courtyard
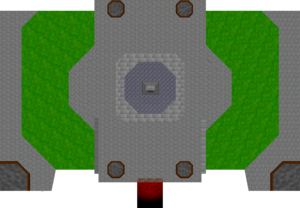
The courtyard is the location of Big Boo's Haunt, whose entrance is hidden inside the Courtyard Big Boo. There are 9 other regular Boos in the Courtyard, spawned by Courtyard Boo Spawners. If the player has less than 12 stars, the regular Boos do not spawn, and the Big Boo spawns but immediately despawns itself.
A Press Counts
Castle navigation requires 5 A presses on the JP 1.0 version of the game and 8 A presses on all other versions.
Castle Stars
- Video: https://youtu.be/xbYhjmhIdJ8
The three stars from Toad and two stars from MIPS can be collected in 0 A presses, not requiring any special tricks.
Stage Entries
- Video: https://youtu.be/mlHzqJn2SMs - does not include any A press saves discovered after 2013.
Most stages are trivial to enter with 0 A presses. Bob-omb Battlefield, Whomp's Fortress, Jolly Roger Bay, Cool, Cool Mountain, Big Boo's Haunt, Lethal Lava Land, Shifting Sand Land, Dire, Dire Docks, Snowman's Land, Tall, Tall Mountain, The Princess's Secret Slide, Tower of the Wing Cap, Bowser in the Dark World, and Bowser in the Fire Sea require at most a dive recover to enter, although it is somewhat precise for a few stages.
Hazy Maze Cave (0x)
- Video: https://youtu.be/uDtInisrqqM
Hazy Maze Cave originally required 1 A press to reach the door to its room. This was saved by using MIPS to perform a star dance clip up on to the ledge.
Wet-Dry World (0x)
While the painting for Wet-Dry World can be entered with a simple dive recover, it is only possible to enter the painting at the lowest water level, the medium and high levels both too high to reach without jumping. This was originally an issue for Top O' the Town, which required a high water level to collect 0x, but since then several 0x strategies have been discovered starting on the low water level.
Tiny-Huge Island (0x)
- Video 1 (Star Dance Clip): https://youtu.be/eCCVpEK2YbQ
- Video 2 (Double Goomba Bounce): https://youtu.be/NofsiJ6nCLs
Entering the tiny painting can be done with a dive recover, but the huge painting is high enough off the ground that it requires a jump to enter. However, the tiny painting strands Mario in an area seemingly inescapable without pressing A while the large one did not, causing the large painting to originally be the most optimal one to enter. A strategy was later found by using two Goomba bounces and the Fire Piranha Plant infinite coin glitch to perform a star dance clip up to the mainland of the tiny island. Later, a faster strategy was found by luring and using two Goomba bounces to land on top of the ! Block and dive recover to the mainland from there.
Tick Tock Clock (3x)
- Video 1 (Stop Time for Red Coins): https://youtu.be/5pmjLkuhwY0
- Video 2 (The Pit and the Pendulums): https://youtu.be/88dOvcz_dQk
- Video 3 (Get a Hand): https://youtu.be/1kfkiH51AA8
Tick Tock Clock normally requires 1 A press to enter for each star, as the clock face is too high up to reach otherwise. The time on the clock does not affect the strategy in any way. However, for three of the stars in the stage, it is possible to land on the spinners at the bottom of the stage and use Spawning Displacement, which causes Mario to land on top of the clock and re-enter without requiring another A press.
For Stop Time for Red Coins, it is simply possible to clone the star over the spinners, causing Mario to drop down on it.
For The Pit and the Pendulums, the star is close enough to the wall that it is possible to punch the wall and collect the star at the same time, causing Mario to have large backwards momentum and land on the spinners. This was originally done with a kick, but that became no longer possible when the rest of the star was lowered to 0 A presses, needing the much more precise punch instead.
Get a Hand also requires a kick, but this one is more complicated. The star is too low down for Mario to simply kick the wall, as he would go below the spinners. Instead, Pendulum Manipulation is used to get the pendulum to swing up to the star, then Mario enters the point where all 10 wall triangles converge at a point, getting massively displaced backwards enough to reach the spinners. Despite Get a Hand being possible in 0 A presses, this strategy requires a kick, meaning that it is completed in 0.5 A presses in a full-game run. However, this does not add any A presses to the total count as it simply leeches off a previous A press.
Due to spawning displacement being patched, these strategies are only possible on the JP 1.0 version of the game, and are what causes that version to be the most optimal for a 120-Star ABC run, meaning other versions require all 6 A presses to enter Tick Tock Clock. It should also be noted that even if spawning displacement was discovered for one of the other three stars in TTC, it would not save an A press as TTC also requires three different HOLPs to be set in other levels for the stars within.
Rainbow Ride (1x)
Rainbow Ride requires a precise sideflip from the bottom step to barely ledge grab onto the alcove containing the stage entrance. Since collecting a star from this stage spits Mario back up next to the stage entrance and not down on the floor below, the A press is only required once.
Secret Aquarium (0x)
- Video 1 (Hyperspeed Walking, VC only): https://youtu.be/ujLjEbCykOQ
- Video 2 (Hyperspeed Punching): https://youtu.be/7YhJcF9v7QQ
- Video 3 (Pedro Spot): https://youtu.be/Qpl5lnxiU6k
The original strategy for this stage entry was only possible on Virtual Console. It used Hyperspeed Walking in Hazy Maze Cave to gain enough speed, then pause-exit and use Parallel Universes to navigate to the upper part of the lobby and reach the entrance to the stage.
The original strategy to enter SA on any platform was to go to Shifting Sand Land, clone a shell and fire in the corner and lure a fly guy, then use hyperspeed punching to gain speed. The fire and shell clone are used to lower Mario's speed to a manageable amount, then the fly guy is used to refine it even further and pause-exit out. Afterwards, the entry requires extremely precise movement in the castle lobby to navigate to the top floor, then perform text redirection on the door to The Princess's Secret Slide to redirect Mario's speed to the perfect angle to perform a Glitchy Ledge Grab on the Secret Aquarium entrance.
Since this strategy requires text redirection on a 1-star door, the entire setup must be completed without collecting a single star. C-up sliding in Bob-omb Battlefield is used to gain speed, then pause exit out and redirect it to skip the 8-star door and access the basement with 0 stars.
Several years later, it was discovered that Mario did not need as much speed as was previously thought to perform the lobby movement, meaning a Pedro Spot in Vanish Cap under the Moat could be used instead, lowering the time from approximately 50 minutes to under 10.
Vanish Cap under the Moat (0x)
- Video 1 (MIPS strategy): https://youtu.be/_CYY6h9OjpQ
- Video 2 (Misalignments): https://youtu.be/idnIdj36ZKE
Entering Vanish Cap under the Moat requires ground pounding on the two pillars to lower the water level in the moat. This was originally done by bringing MIPS to the pillars, then walking off and ground pounding, causing MIPS to push Mario back onto the pillar while ground pounding. A faster strategy was later discovered by simply ground pounding in a misalignment on the corner of each pillar.
Cavern of the Metal Cap (0x)
- Video: https://youtu.be/Rql7kxQ9rOk
Entering Cavern of the Metal Cap requires a very precise dive recover off of Dorrie's head to reach the ledge without jumping.
Wing Mario over the Rainbow (1x)
Entering Wing Mario over the Rainbow requires the same A press as entering Rainbow Ride, a sideflip from the bottom step that barely reaches the alcove.
Bowser in the Sky (0x)
- Video: https://youtu.be/VkfRQ0_vu40
While the bottom step can be climbed with a simple dive recover, the rest of them are too tall for that to be possible. The second, largest step is climbable with a precise Glitchy Ledge Grab, while the rest can be climbed with misalignments. Due to the orientation of the stairs, this is only possible on the Rainbow Ride side of the room as they are the only ones to have misalignments.
Other Challenges
In the Coinless Challenge, Capless/Cannonless Challenge, and CCC Challenge, all stars and stage entries are possible.
The Castle provides a huge roadblock for the No Buttons Allowed Challenge and No Joystick Allowed Challenge, as doors and high paintings block most stage entries in those challenges. None of the five stars within the castle can be collected in either challenge.
In the Pacifist Challenge, all five stars can be collected. All stages can be entered with the exception of Big Boo's Haunt, which requires killing a Boo to enter.
In the B Button Challenge, the Castle requires two B presses to grab MIPS both times, as well as an additional three B presses on the JP 1.0 version to talk to the three Toads. All stages can be entered.
In the Z Button Challenge, all stars and stage entries are possible. Entering Vanish Cap under the Moat requires PU movement to skip pounding the two pillars.
In the UBER Challenge, the first MIPS star can be collected, as MIPS is an exception to the UBER Challenge rules. The second MIPS star cannot be collected as there are not enough possible stars to unlock it. Big Boo's Haunt cannot be entered, as it requires killing a Boo. Whomp's Fortress also cannot be entered, as Lakitu talks to Mario when entering the course.
There are multiple unsolved challenges in the Castle: reaching a Parallel Universe in the basement, upstairs, or courtyard, hanging below the entrance bridge with the water raised, accessing the upper floors without collecting the key from Bowser, and performing Instant Release on MIPS.
References
| ||||||||||||||||||||||||||||||||