Tick Tock Clock
- For a tutorial on speedrunning this star, see the RTA Guide
- For a tutorial on RTABC for this star, see the RTABC Guide
| Tick Tock Clock | |
| |
| Course Info | |
| Abbreviation | TTC |
| Terrain | Default |
| Setting | Foggy |
| Water | None |
| Course Items | |
| Coins | 126 ( |
| Enemy Coins | 2 ( |
| Stars | |
| Star Navigation | |
| Overview | |
| |
| |
| |
| |
| |
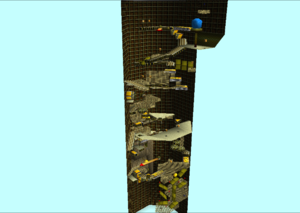
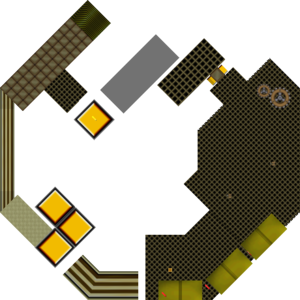
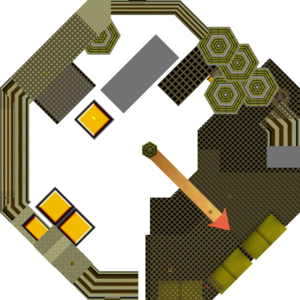
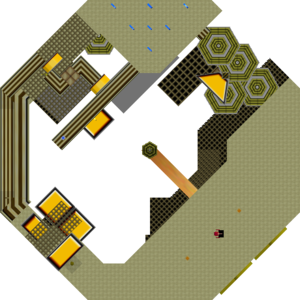
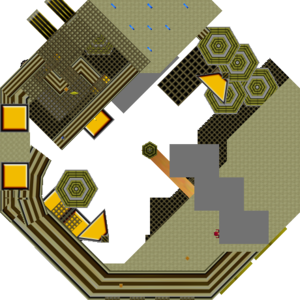
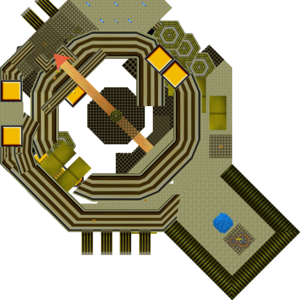
Tick Tock Clock is the 14th course of Super Mario 64. The main theme of this course is a clock. This level's core focus is in platforming with variable part movement in the clock. Like Rainbow Ride and other open air courses, Mario can fall into the death barrier at any time, from any height.
Clock Settings
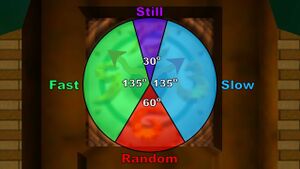
Tick Tock Clock has four clock settings. Each one depends on the position of the minute hand of the clock painting when Mario enters it. The clock settings are still, slow, fast, and random. Each clock setting affects the behavior of the moving objects within Tick Tock Clock, detailed under their specific object pages. Specifically, the following objects take into account the clock setting:
In general:
- On the still setting, moving and rotating platforms do not attempt to move. The Thwomp, however, still moves. Pedro spots are common on this setting. This setting was once used for the A Button Challenge because of a specific Pedro spot on the cogs.
- On the slow setting, moving and rotating platforms move slowly.
- On the fast setting, moving and rotating platforms move quickly. Using Vertical Speed Conservation on an elevator, the most vertical speed can be stored on the fast setting compared to other settings.
- On the random setting, most objects call RNG to determine their movement. This setting is used for the A Button Challenge, the ABZ Button Challenge, the Buttonless Challenge, and many more because of its potential for manipulation. On this setting, there is potential for squish cancel on the moving bars and pendulums, and pendulum manipulation is also possible. There is a Pedro spot on a certain pendulum box that saved 3 A presses on Stomp on the Thwomp[1] that exists on every setting, but it is only possible to enter it with pendulum manipulation on the random setting.[2]
Upwarp
In 2013, speedrunner DOTA_Teabag managed to capture an upwarp glitch during a speedrun race with MidBoss. 2 years later, due to the inability to replicate this upwarp, pannenkoek2012 placed a US$1,000 bounty for anyone who could replicate and record the upwarp in Mupen64[3]. The bounty has not yet been claimed, and the upwarp has yet to be replicated.
However, in May of 2020, a runner named dumpdome64 ran into a similar glitch while practicing the Tick Tock Clock 100 Coin Star route.[4] While practicing, a push block from high in the course suddenly appeared much lower in the course, at a Y-position close to 0. In addition, Mario's shadow became glitched for 1 frame at several points later on. Preliminary analysis suggests that all of these glitches were the result of a single bit being changed for 1 frame and a connection between these and the upwarp is possible.
Coins
There are 128 coins naturally in the course. With cloning, it is possible to clone 127 extra coins to bring the coin count to 255, or clone 151 coins to bring the coin count to 279 coins before the game crashes due to object slots.
| Location | Count |
|---|---|
| 10 coins in ! block behind start with spinning heart | 10 |
| 2 coins above first turning cube | 2 |
| 3 coins in ! block behind second pendulum | 3 |
| 3 coins in ! block by the first moving hand | 3 |
| Slanted line of coins beside the first pole (with amp) | 5 |
| 3 coins in each ! block with Heave Ho (there are 2 blocks) | 6 |
| 3 coins in ! block on top of "Timed Jumps on Moving Bars" star | 3 |
| 10 coins in ! block above the 4 "block pushers" in a row | 10 |
| 3 coins in ! block, on main path, just past 3 spinning platforms | 3 |
| 10 coins in ! block underneath the Thwomp | 10 |
| 10 coins in the first ! block at the very top of the clock | 10 |
| 10 coins in ! block on the middle platform (drop from very top) | 10 |
| 2 Bob-ombs | 2 |
| 8 Red Coins | 16 |
| 7 Blue coins from block (by "The Pit and the Pendulums" star) | 35 |
| Total | 128 |
A Press Counts
There are no A presses needed inside TTC in the A Button Challenge.
It should be noted that it requires 1x A press to enter TTC, which is repeated three times.
Spawning Displacement A Press Saves
Mario can collect Stop Time for Red Coins on a spinner by cloning it. He can also collect both The Pit and the Pendulums and Get a Hand[5] on a spinner by kicking a wall as he collects them, allowing him to keep that momentum and fall across the course, landing on a spinner down below. These spinners can be used on the random setting to provide spawning displacement that allows Mario to spawn back on top of the clock, which saves 1 A press each time it is used[6].
Other Challenges
In the Coinless Challenge, excluding coin missions, all stars can be collected. The same stars can be collected in the CCC Challenge.
In the Capless/Cannonless Challenge, all seven stars can be collected.
In the No Buttons Allowed Challenge, Get a Hand and Stop Time for Red Coins can be collected. The former requires Pendulum Manipulation to reach the star.
In the No Joystick Allowed Challenge, every star except for Stomp on the Thwomp and 100 Coins can be collected.
In the Pacifist Challenge, all seven stars can be collected.
In the B Button Challenge, the entire course is possible in 0 B presses.
In the Z Button Challenge, the entire course is possible in 0 Z presses. 100 Coins requires coin cloning to avoid ground pounding the Blue Coin block.
In the UBER Challenge, excluding coin missions, all stars can be collected.
There are multiple unsolved challenges in this course: getting infinite coins and reaching a Parallel Universe.
Trivia
- Tick Tock Clock holds the distinction of having a shorter draw distance for objects compared to the other courses. The default draw distance for objects in Tick Tock Clock is 2000 units, half of the game's regular 4000 units.
References
- ↑ "TTC Pedro Spot on Pendulum Box" by UncommentatedPannen
- ↑ "SM64 - TTC Pendulum Box Pedro Spot" by ds273
- ↑ "SM64 - TTC Upwarp $1000 Bounty" by pannenkoek2012
- ↑ "weird teleporting thing" by dumpdome64
- ↑ "TTC Get a Hand & Re-Enter 0.5x A Presses" by UncommentatedPannen
- ↑ "TTC 0x Re-Entry using Spawning Displacement Standings" by UncommentatedPannen
| ||||||||||||||||||||||||||||||||
