Dire, Dire Docks
- For a tutorial on speedrunning this star, see the RTA Guide
- For a tutorial on RTABC for this star, see the RTABC Guide
| Dire, Dire Docks | |

| |
| Course Info | |
| Abbreviation | DDD |
| Terrain | Water |
| Setting | Day |
| Water | Mostly All |
| Course Items | |
| Coins | 106 ( |
| Enemy Coins | None |
| Stars | |
| Caps | |
| Star Navigation | |
| Overview | |

| |

| |

| |
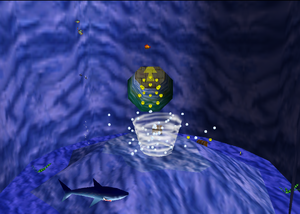
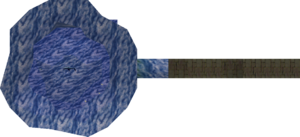
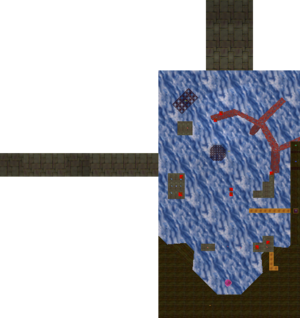
Dire, Dire Docks is the ninth course of Super Mario 64. The entrance is a large water-like painting, and once Board Bowser's Sub is completed, it will move back to the end of the hallway, exposing the entrance to Bowser in the Fire Sea.
Course Versions
There are two versions of the course that can appear by selecting different stars. Keep in mind that if there are any blue stars (uncollected) present in the star selection menu, then the last version that can be selected is the first blue star and not the stars after it:
- Version 1: Accessed by selecting Star 1. The manta ray is not present.
- Version 2: Accessed by selecting Star 2 through Star 6. The manta ray will appear.
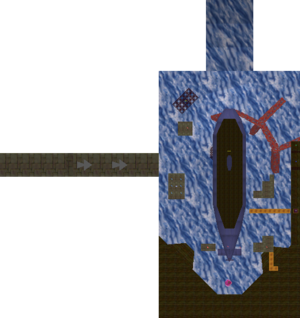
Additionally, Bowser's submarine and the hatch cover will disappear after Bowser in the Fire Sea is completed, replaced by several moving poles across the ceiling of the course.
Coins
This stage has natural maximum of 106 coins, although this can be extended. Coin spawner cloning via the loading zone using a water shell allows infinite collection of coins in this course.
| Location | Count |
|---|---|
| Sloped line of coins underwater on the wall near start | 5 |
| 2 vertical lines of coins, by chests and first current | 10 |
| 3 coins surrounding a chest on sea floor | 3 |
| 3 rings of coins leading to Bowser's sub area | 24 |
| Ring of coins on sea floor, by clam with koopa shell | 8 |
| Vertical line of coins, by the moat exit | 5 |
| Line of coins on the wooden dock, in Bowser's sub area | 5 |
| 8 Red Coins | 16 |
| Blue coin block above Bowser's sub | 30 |
| Total | 106 |
A Press Counts
In the A Button Challenge, two of the seven stars require an A press to be held but do not incur additional A presses to complete. Thus, the notation "0.5 A presses" is used.
| Star | A Presses | Minutes |
|---|---|---|
| 1 | 0 | 3 |
| 2 | 0 | 3 |
| 3 | 0.5* | 14 |
| 4 | 0 | 3 |
| 5 | 0 | 1 |
| 6 | 0 | 3 |
| 100 | 0.5* | 25 |
| *Holding an object while swimming requires an A press to be held, hence the 0.5x notation. | ||
Entering Dire Dire Docks (0x)
Since the painting is very large, walking into it will suffice and it is not required to dive.
Board Bowser's Sub (0x)
- Video: https://youtu.be/4JEoBwuXkzQ
The main problem is ascending to Bowser's submarine since Mario cannot climb up to it from the water. However, a technique known as 207 Dive Recover can be used to ascend from the cork boxes using the misalignment, a 1-unit region where Mario cannot be pushed out by the walls and can snap onto the floor above. Using this technique, Mario can board Bowser's sub and collect the star.
Chests in the Current (0x)
- Video 1 (main strategy): https://youtu.be/WXXR-cwhW9w
- Video 2 (alternative, faster strat): https://youtu.be/cTNlkmiGNRw
Mario can collect the star by opening the chest in the correct order. The main problem is opening the 4th chest, which is very close to the underwater vortex and can only be escaped with enough speed (10 using precise movements). Using underwater grabbing (with precise B presses), Mario can only go up to 7 speed, so Pannenkoek first grabs an underwater shell on the other side of the tunnel to conserve 16 speed, allowing Mario to escape the current when opening chests.
Eventually, Pannekoek figures out an alternative, quicker method involving Hyper Speed Walking on the slippery slopes at the surface of the course, allowing Mario to build up to 50 speed and convert it to 11 swimming speed. This is barely enough to escape the vortex after the fourth chest is opened.
Pole-Jumping for Red Coins (0.5x)
- Main article: Pole-Jumping for Red Coins
- Video: https://youtu.be/gvQMNQlgu3s
The main challenge is collecting the two red coins behind the red walls and the one lone coin in the cage. The 0.5 A press is used for swimming in water with an object, as Mario needs to hold a shell through the loading zone. For the two coins behind the red walls, Mario clones a pole directly between two widely-separated poles for Mario to get across. For the caged red coin, the HOLP with a dummy clone at a specific location for cloning a whirlpool clone to exploit the "no transition loading glitch".
The transition loading is a procedure the game uses to create an illusion for two connected areas. Normally, the loading point would translate Mario's position by 8192 units to fit in the new coordinates system of the new area, but a failsafe mechanism exists to reject the translation if Mario's new position would be out of bounds. By placing a whirlpool clone into a position out of bounds, Mario can avoid the loading point translation by being pulled by the whirlpool clone through the wall and triggering the loading point at the same frame. As the new area loads, Mario begins to spiral, not around the whirlpool, but the newly loaded cork box replacing the whirlpool clone. He is then able to escape from the whirlpool death as the spiraling path grazes on a platform Mario can stand on, conveniently close to where the caged red coin is.
Through the Jet Stream (0x)
- Video: https://youtu.be/2kayePVdnw8
Previously, Pannenkoek uses 0.5 A presses (holding out the previous A) to collect the star by either cloning a pole to access the caps or use loading point cloning without the Metal Cap, as accessing the caps requires A presses to reach. However, the 207 dive recover strategy allowing ascending the cork boxes was soon discovered, allowing Mario to use the Metal Cap with 0 A presses. Mario simply swims through the 5 aqua rings and collect the star by using a metal cap.
Unlike the star in Jolly Roger Bay, this star is close enough to the ground for Metal Mario to pick it up by walking into it underwater.
The Manta Ray's Reward (0x)
- Video: https://youtu.be/EHcih_XvYTM
Due to low swimming speed without A presses, Mario has to preemptively go in front of the manta ray and follow the rings. Other than that, the stage is simple to complete.
Collect the Caps… (0x)
- Video: https://youtu.be/pYTzVFC0Qoo
Mario needs to use the 207 dive recover trick twice, first to collect the vanish cap, and then collect the metal cap. Mario would then have enough speed to drop down into the water while retaining invisibility to enter the cage. Mario then swims upwards to collect the star.
This takes the advantage from the fact that the vanish cap timer (20 seconds) resets while grabbing the metal cap, allowing the vanish cap to last long enough.
DDD 100 coins (0.5x)
- Video: https://youtu.be/vkHU_IFmvoQ
As the coin count of the course is 106, 30 of which is from the blue coin block inaccessible without A presses and 16 of which is from red coins, there are only 60 yellow coins that can be collected. Fortunately, there are many coin spawners of 8 that Mario can use to clone since there is a loading point in the course. Therefore, Mario can get infinite coins by "coin spawner cloning". The process is estimated to take 25 minutes.
Since cloning is involved, Mario needs to hold down A in order to swim with an object held.
Other Challenges
In the Coinless Challenge, excluding coin missions, all stars can be collected. The same stars can be collected in the CCC Challenge, where Collect the Caps... must be cloned with the water shell, and Through the Jet Stream requires efficient swimming.
In the Capless/Cannonless Challenge, all seven stars can be collected.
In the No Buttons Allowed Challenge, no stars can be collected, as they all require swimming.
In the No Joystick Allowed Challenge, no stars can be collected, as Mario cannot turn in the water. Note that when entering the level, Mario's angle doesn't face the tunnel.
In the Pacifist Challenge, all seven stars can be collected.
In the B Button Challenge, the entire course is possible in 0 B presses.
In the Z Button Challenge, the entire course is possible in 0 Z presses. 100 Coins requires coin spawner cloning to avoid ground pounding the Blue Coin block.
In the UBER Challenge, Board Bowser's Sub, Chests in the Current, and Collect the Caps... can be collected. The latter requires Hyperspeed Wall Kicking to go behind the wall.
In the Floor is Lava Challenge, every star except for 100 Coins can be collected, as Mario starts the level in the water. 100 Coins is impossible because it either requires ground pounding the Blue Coin block and landing on the ground, or using coin spawner cloning, which requires walking out of the water.
There is an unsolved challenge in this course, to reach a Parallel Universe in the starting area.
References
| ||||||||||||||||||||||||||||||||