Whomp's Fortress
| Whomp's Fortress | |
| |
| Course Info | |
| Abbreviation | WF |
| Setting | Day |
| Water | Almost None |
| Course Items | |
| Coins | 106 ( |
| Enemy Coins | 35 ( |
| Stars | |
| Caps | |
| Star Navigation | |
| Overview | |
| |
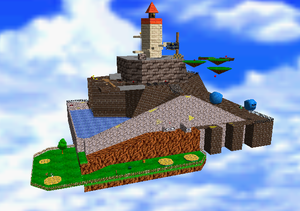
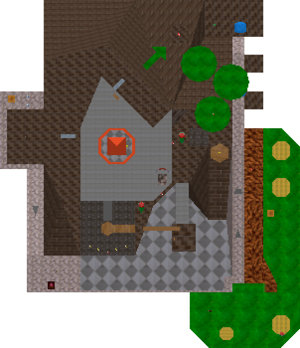
Whomp's Fortress is the second course. It can be accessed from the painting in the room located in the right side of the lower first floor of Princess Peach's castle. This course is typically fast and is often the first course completed in runs (due to BoB's near requirement for wing cap).
Access
Whomp's Fortress door typically requires one star to enter, however, using LBLJ in the lobby gives access to the level without either the door or the star requirement.[1] Entering this level can also be done without the use of the A button[2], and most likely 2 presses for the ABZ/Buttonless Challenge. Entering this level the first time also triggers textboxes, which costs the ABZ/Buttonless Challenge at least 4 presses. (This has been yet to be shown on video.)
Course Versions
This course has three versions-
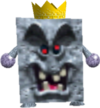
- Version 1: Accessed by selecting Star 1. This version contains King Whomp at the top of the course.
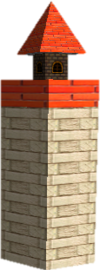
- Version 2: Accessed by selecting Star 2. This version contains a fortress built on top of the course.
- Version 3: Accessed by selecting Star 3 through Star 6. Bob-omb buddy is present to open the cannon, and an owl can be summoned from the tree near the starting point. The fortress is still present.
Coins
Whomp's Fortress has a total of 141 coins collectible without the utilization of glitches, with most most coins coming from coin spawners. This course has two different coin duplication glitches, however, that push the maximum beyond 141 coins- cloning and the breaking-disappearing cork box glitch. Both of these utilize the cork boxes in the level, and can both take the maximum over the max in-game coin score of 255. The breaking-disappearing cork box glitch pushes the bounds a bit farther, though, and allows 999 to be collected in course.
| Location | Count |
|---|---|
| The two throwable cork boxes (near start/blue coin block) | 6 |
| Coins around the flower near the start | 8 |
| Line of coins near the beginning | 5 |
| Line of coins on bridge past the falling bridge | 5 |
| Coins around the rotating plank | 4 |
| Ring of coins on the floating isle | 8 |
| Arrow of coins on the floating arrow | 8 |
| Line of coins on slope leading from the water | 5 |
| Ring of coins in water | 8 |
| Line of coins near the bob-omb buddy | 5 |
| Ring of coins above the "Shoot into the Blue" Star | 8 |
| 2 Whomps | 20 |
| Red Coins | 16 |
| Blue Coin Block | 20 |
| 3 Piranha Plants | 15 |
| Total | 141 |
Course Objects
Below is a table of all objects loaded in when the level loads. Processing order doesn't necessarily mean the slot they would occupy, just a reference for what objects come before and after that object.
TASes
Star 1: https://youtu.be/NamWHywBEBY[3]
Star 2: https://youtu.be/NamWHywBEBY?t=32s[3]
Star 3: https://youtu.be/3ymjsb513PQ[3]
Star 4: https://youtu.be/XDR68FZdihE[3]
Star 5: https://youtu.be/fvJxQp6kaXE[3]
Star 6: https://youtu.be/8WCdtGT6CF4[3]
A Press Counts
In the A Button Challenge, it takes no A Presses to collect all seven stars, though the Wing Cap and the Metal Cap need to be unlocked to complete To the Top of the Fortress.
| Star | A Presses | Minutes |
|---|---|---|
| 1 | 0 | 2 |
| 2 | 0 | 8 |
| 3 | 0 | 1 |
| 4 | 0 | 2 |
| 5 | 0 | 2 |
| 6 | 0 | 1 |
| 100 | 0 | 0* |
| *100 coin star already used to collect Star 2. | ||
Entering Whomp's Fortress (0x)
This part is easily done without pressing A by using a dive recover into the painting.
Chip Off Whomp's Block (0x)
- Video: https://youtu.be/7ZwwAemsbYQ
The trickiest part is collecting the star, since the star is 296 units high[4], which is too low to be reached by dive recovering. While it might seem impossible to reach the star unless an A press is used to jump, Mario can fortunately collect it by cloning. By bringing a fake cork box up and defeating King Whomp, Pannenkoek is able to clone the star and collect it by holding Vacant Slot 41 (VS41).
To the Top of the Fortress (0x)
- Main article: To the Top of the Fortress
- Video: https://youtu.be/M4M_OyUorRQ
Before entering the stage, the HOLP needs to be set at a specific location in Bob-omb Battlefield.
Upon entering the stage, Mario starts collecting many coins in order to spawn the 100-coin star at the right moment. The Metal Cap is collected twice to activate the hat-in-hand object displacement glitch. Using the glitch, Mario carries the cork box up the mountain (during which he throws the cork box multiple times and catch it while it is falling down from the HOLP to speed up the process). Using clever tricks, he is then able to pick up the cork box during the time he is ascending from the elevator, and he collects all the coins from the floating island. At this point, Mario has 99 coins. The box is then thrown to appear from the HOLP and break next to the tower, exposing the 100th coin at the desired location. Mario collects it, spawning the star next to one of the tower's steps.
Mario dives down to the lower part of the course, grabbing the second cork box, and bringing it upwards. At the top floor, With precise movements, Mario remotely throws the cork box, stores 26 vertical speed on the elevator by canceling a dive recover on the steep part of it, allowing the cork box to push him off to reactivate the stored speed, ground pounding to gain height next to a platform of the tower (where the 100-coin star is), and then grabbing on the ledge while collecting the 100-coin star using Star Dance Clip. After the collecting the star, Mario then climbs up the rest of the tower and collects To the Top of the Fortress.
For both times going up, Mario has to hold a cork box frame-walking up a slope. With very precise movements, Mario can carry the box and bounce on the ground to reach the elevator[5], instead of having to drop the box at the HOLP and pick it up later on the arrow platform.
Shoot into the Wild Blue (0x)
- Video: https://youtu.be/CA-EZx_kunY
The star can be collected by going from the top. Using the secret teleporter at the corner of the platform where the Metal Cap is located, Mario can teleport to a higher floor above where the star is located. Mario then drops down to collect the star.
Red Coins on the Floating Isle (0x)
- Video: https://youtu.be/E6J71oX8o78
All coins are reachable without pressing A, though getting to the floating islands requires using a Whomp enemy as help to get on the ascending elevator. Using series of diving and dive recovers, with help from the teleporters, Mario is able to get all red coins in the course and collect the star.
Fall onto the Caged Island (0x)
- Video: https://youtu.be/mXy8Wlw3sRU
This star is done without pressing A by using Version 1 of the course where King Whomp is present (Chip Off Whomp's Block). By manipulating the location and angle of King Whomp, Mario can land on top of Whomp and perform a slide kick onto the caged platform.
Blast Away the Wall (0x)
- Video: https://youtu.be/CA-EZx_kunY
With a ledge-grab glitch very well-known in speedrunning, it is already known that using the cannon to shoot open the wall is completely unnecessary. All Mario has to do is grabbing the ledge where the star is located using a specific angle.
WF 100 Coins (0x)
- Video: https://youtu.be/anKoV6eZBi8
In a full game run of 120 stars, this star will already be collected while doing To the Top of the Fortress. That being said, the star can still be collected without pressing A when done in isolation, with no difficult tricks required.
Other Challenges
In a CCC Challenge, excluding coin missions, all stars can be collected, with Blast Away the Wall completed less conventionally by using a precise ledge grab in order to avoid the use of cannon.
In a No Buttons Allowed challenge, Find the 8 Red Coins and Behind Chain Chomp's Gate can be collected using only the joystick and the C buttons (to turn the camera)[6].
In a No Joystick Allowed challenge, Chip Off Whomp's Block, To the Top of the Fortress, Red Coins on the Floating Isle and 100 coins star can be collected without using the joystick[7].
References
- ↑ https://youtu.be/kfycfhhkhic?t=27s
- ↑ https://youtu.be/mlHzqJn2SMs?t=33s
- ↑ 3.0 3.1 3.2 3.3 3.4 3.5 TAS Times: https://docs.google.com/spreadsheets/d/12Sl41gqLUGzBU0p1nx7uNKOAP835NIoFXqda1j6oqag/
- ↑ Star Height: https://youtu.be/xE7hrQ8sHhU?t=2m15s
- ↑ WF Top of Fortress 0x Faster Strat to Bring Up Box: https://youtu.be/r_AKMelAQBY
- ↑ No Buttons Allowed: https://youtu.be/hUIYR4PssIY, https://youtu.be/Nlxvh0ldfs8
- ↑ No Joystick Allowed: https://youtu.be/75ihh8bFXPM, https://youtu.be/hD9nuRU1Jfc, https://youtu.be/B4IgwsRnNis, https://youtu.be/6AAbHJ-BrLQ
| ||||||||||||||||||||||||||||||||


