Bob-omb Battlefield: Difference between revisions
mNo edit summary |
mNo edit summary |
||
| Line 8: | Line 8: | ||
|yellow-coins=102 | |yellow-coins=102 | ||
|red-coins=8 | |red-coins=8 | ||
|blue-coins=0 | |||
|enemy-yellow=23 | |enemy-yellow=23 | ||
|enemy-blue=1 | |enemy-blue=1 | ||
Revision as of 08:00, 29 June 2018
| Bob-omb Battlefield | |

| |
| Course Info | |
| Abbreviation | BoB |
| Setting | Day |
| Water | None |
| Course Items | |
| Coins | 118 ( |
| Enemy Coins | 28 ( |
| Stars | |
| Caps | |
| Star Navigation | |
| Overview | |

| |
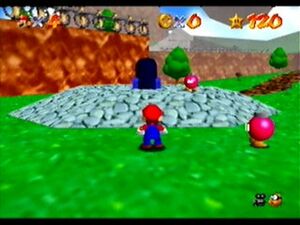
Bob-omb Battlefield is the first course in Super Mario 64. It can be accessed from the painting in the far-left room on the first floor of Princess Peach's castle. Being the first course of the game, the door leading to it does not require any Power Stars to be opened.
Course Versions
There are three versions of the course that can appear by selecting different stars. Keep in mind that if there are any blue stars (uncollected) present in the star selection menu, then the last version that can be selected is the first blue star and not the stars after it:
- Version 1: Accessed by selecting Star 1. This version contains King Bob-omb and without the extra bowling ball and Koopa shell. Bob-omb buddy is not present.
- Version 2: Accessed by selecting Star 2. This version contains Koopa the Quick and the extra bowling ball but without the Koopa shell. Bob-omb buddy is present to unlock the cannon.
- Version 3: Accessed by selecting Star 3 through Star 6. This version contains the extra bowling ball and Koopa shell. The Bob-omb buddy is present.
TASes
Star 1: https://youtu.be/dEDjZD0SVyM[1]
Star 3: https://youtu.be/TamWF-IBy30[1]
Star 4: https://youtu.be/i8ILR02LFeE[1]
Star 5: https://youtu.be/MyUb-snKn5c[1]
Star 6: https://youtu.be/MzbDhnI2T5g[1]
[give description of yaw/pitch conservation and other stuff like speed reflection off of trees, king bobomb fast strat, and reducing lag frames]
A Press Counts
In the A Button Challenge, it takes no A Presses to collect all seven stars, though the Wing Cap, unlocked by pressing the switch in Tower of the Wing Cap, is required to complete Mario Wings to the Sky.
| Star | A Presses | Minutes |
|---|---|---|
| 1 | 0 | 2 |
| 2 | 0 | 2 |
| 3 | 0 | 1 |
| 4 | 0 | 2 |
| 5 | 0 | 42* |
| 6 | 0 | 1 |
| 100 | 0 | 3 |
| *56 minutes including setting HOLP in BoB. | ||
Entering Bob-Omb Battlefield (0x)
- Video: https://youtu.be/mlHzqJn2SMs
This part is easily done without pressing A by using a dive recover into the painting.
Big Bob-Omb on the Summit (0x)
- Video: https://youtu.be/h8MjSIMekrg
Scaling the mountain is easily done even without using the teleporters near the flowers or using the mountain warp. As the geometry of the course is mostly flat, there should be no difficulty even when climbing up the mountain. Simply scale the mountain and defeat King Bob-Omb without pressing A.
Footrace with Koopa The Quick (0x)
- Video: https://youtu.be/ERlN9BDxBcw
This one is harder as it involves speed, but still possible. Talk to Koopa the Quick and start running. The tilting bridge can be crossed by waiting a while at one end, then slide kicking off of the other. Afterwards, simply scale the mountain. At no point is pressing A mandatory.
Shoot to the Island in the Sky (0x)
- Video 1 (Goomba Bridge): https://youtu.be/54iInYhelg4
- Video 2 (Shell Hyperspeed): https://youtu.be/vGCclfj6YC0
Completing this star is not easy. Initially, Pannenkoek ended up constructing a Goomba Bridge to get to the island and placing a Bowling Ball directly underneath the star. Grabbing a cork box, he went back up his Goomba Bridge and grabbed it as it turned fake to clone another Goomba. Finally, he released the Goomba by getting knocked back by the bowling ball and opened the star's item block using the said knockback, then the Goomba clone facilitated Mario to gain enough height to reach the star, as the star is 313 units above ground[2].
Eventually, in 2017, Pannenkoek used Shell Hyperspeed to complete the star by accumulating negative speed with the shell, reaching over -440 with which he went to the mountaintop, and launching towards the floating island. Mario then ground pounds the item block in midair to collect the star.
Find the 8 Red Coins (0x)
- Video 1 (Goomba Bridge): https://youtu.be/9RUSM-aqQeM
- Video 2 (Shell Hyperspeed): https://youtu.be/BB5RpMUNAV4
Since most of the coins are relatively easy to get, all effort goes into the one red coin located on the floating island. Luckily, there are many ways to collect it.
In the initial run, Pannenkoek utilized the previously mentioned Goomba Bridge, as seen in the previous star. After the seven other coins were easily collected, he constructed a Goomba Bridge towards the island.
Eventually, in the second video, Pannenkoek used Shell Hyperspeed to accumulate high negative speed with the shell and launches towards the floating island using the previously described method. The shell also has the benefit of speeding up the collection of the remaining coins.
Mario Wings to the Sky (0x)
- Main article: Mario Wings to the Sky
- Video 1: https://youtu.be/YpcMlj8BwWE
- Video 2: https://youtu.be/vbWKnuW16L0
For this entry we will use the actual instructions listed by Pannenkoek:
First, I create goomba staircase up to a particular point above the floating island, and place the HOLP there. Then, I exit and re-enter the course to reset the goombas (but the HOLP placement will stay). Next, I use shell hyper speed to collect the lowest three secrets. Then, I create a goomba oasis between the fourth and fifth secrets. Finally, I create a second goomba staircase up to the oasis, and then ride both the staircase and oasis to collect the last two secrets in one go, and lastly collect the star.
Collecting the star without A Presses takes 56 minutes, including setting up the HOLP in Bob-omb Battlefield, and 42 minutes without accounting the time to set up the HOLP.
Behind Chain Chomp's Gate (0x)
- Video 1 (Goomba clone): https://youtu.be/s87uNx50j38
- Video 2 (Shell Hyperspeed): https://youtu.be/7s2qptzjcJ8
Getting Behind the Gate is easy, but getting the star is not. First, Pannenkoek did some manipulation to reliably get goomba clones. Then, he went behind the gate using a cork box and used that same box to clone the Goombas in such a way that he could ascend to the star using a Goomba Staircase.
Eventually, in the second video, Pannenkoek uses Shell Hyperspeed to accumulate higher than -500 speed to clip behind the gate with enough height to collect the star behind the gate.
BoB 100 Coins (0x)
- Video: https://youtu.be/gSVIl_DMyXc
This star requires getting all coins except the one red on the Floating Island and the coins in Mario Wings to the Sky. After collecting the easily accessible coins, Pannenkoek clones a singular yellow coin for the star. Even without cloning, the shiny shell (accessible from Star 3 onward) can also greatly facilitate in collecting the coins of the course and reach the floating island via Backwards Shell Hyperspeed.
Other Challenges
In a CCC Challenge, Mario Wings to the Sky is the most challenging mission to complete, as it requires the use of Parallel Universes for the first four secrets and a complicated setup to achieve a high VSC for the fifth secret (with cloning being an alternative)[3].
In a No Buttons Allowed challenge, Find the 8 Red Coins, Behind Chain Chomp's Gate, and 100 Coins can be collected using only the joystick and the C buttons (to turn the camera)[4].
In a No Joystick Allowed challenge, Big Bob-omb on the Summit and Behind Chain Chomp's Gate can be collected without using the joystick[5].
References
- ↑ 1.0 1.1 1.2 1.3 1.4 TAS Times: https://docs.google.com/spreadsheets/d/12Sl41gqLUGzBU0p1nx7uNKOAP835NIoFXqda1j6oqag/
- ↑ Star Heights: https://youtu.be/xE7hrQ8sHhU?t=2m34s
- ↑ CCC: https://youtu.be/ucK9bqmgnJA, https://youtu.be/JUIGWVUXUhc
- ↑ No Buttons Allowed: https://youtu.be/voV_QgdLHiY, https://youtu.be/xOs72bQGadQ, https://youtu.be/aJV-yIGMK2A
- ↑ No Joystick Allowed: https://youtu.be/BuDNiW72tFE, https://youtu.be/gAtIO1oER5Y
| ||||||||||||||||||||||||||||||||