RTA Guide/Red-Hot Log Rolling
| Red-Hot Log Rolling | |

| |
| Record Information | |
| RTA World Record | 10.80 (Wingcap) 12.23 (Sidehop) |
| Single Star World Record | 7.90 |
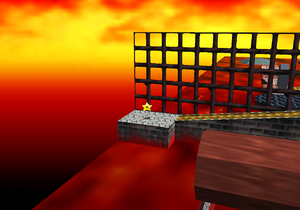
Red-Hot Log Rolling is the fourth mission of Lethal Lava Land. Using wing cap is faster and easier, but wing cap is unavailable in 16 Star, where sidehop strats are used.
Wing Cap
Beginner
Basic movement. To get safely over the wall, be sure to maximise the takeoff triple jump by holding forwards + A until entering flight, at which point tap down-right, then steer.
Advanced
Double-jump dive from the box platform (with lenient spacing), speed-kick to maintain speed into takeoff triple jump.
Expert
Moving backwards against camera, sideflip into box, triple-jump dive from the box platform (with tight spacing for rollout).
Easy Camera
Long-jump to box platform. During fade-in, press R asap, and hold down-left. When Mario lands, press C-down; continue tapping C-down during idle time to prevent the camera from swivelling. As soon as Mario starts moving, hold down; this setup ensures Mario hits the box. Drifting right during the box sideflip makes the triple-jump dive spacing more likely to reach.
Optimal Camera
Jump dive to box platform; requires timing the stick input to line up the camera.
No Wing Cap (Sidehop)
Tutorial
- Initial camera is directly behind Mario (inputs: C-left, R, C-down).
- Dive near the peak of the first double jump for maximum distance (if you're not reaching then walk a little longer before the buffered kick).
- Press R during the first long jump for Lakitu cam.
- Can opt to then do second long jump, or a jump dive + rollout (harder and faster because more speed is preserved).
- Can opt to hold left during the above (easier and slower because there's more space for the next triple jump).
- Triple jump sidehop: hold right to run, then single jump over the slope, then hit neutral to cut speed (you must land the single jump on the flat surface), then tiny double jump, then hold right again, then triple jump.
- Aim to hit wall as high as possible: switch to down-right midair (switching earlier means wall is hit sooner and closer to camera, which is better for triple jumps that start further back from the edge).
- Wall-kick: hold down-right throughout, full A-press for wall-kick; only 2nd and 3rd frame wall-kicks work reliably, and 4th sometimes.
- Hold neutral during ledge get-up, then spam B to dive off (this avoids ledge re-grab).
- Hold down-right asap after the dive, and drift up during the final long jump to run into the star.
Standard (Second Long Jump)
Advanced (Jump Dive)
Alternative Camera
Different angles during sidehop.
| |||||||||||||||||||||||||||||||||||||||||||||||||||||||||||||||||