RTA Guide/HMC 100 Coins: Difference between revisions
No edit summary |
(Added Tutorial for Salt Bog) |
||
| (19 intermediate revisions by 5 users not shown) | |||
| Line 2: | Line 2: | ||
|title= HMC 100 Coins | |title= HMC 100 Coins | ||
|image= HMC.png | |image= HMC.png | ||
|rta_record= | |rta_record=[https://twitter.com/Parsee02/status/1640063924459667457 1:56.56 (with Red Coins)] | ||
|ss_record=[https://www.youtube.com/watch?v= | |ss_record=[https://www.youtube.com/watch?v=-WueEZtI6Fk 1:31.87] | ||
}} | }} | ||
'''Elevate for 8 Red Coins''' is the second mission of [[RTA Guide/Hazy Maze Cave|Hazy Maze Cave]]. | '''Elevate for 8 Red Coins''' is the second mission of [[RTA Guide/Hazy Maze Cave|Hazy Maze Cave]]. | ||
= No BLJ Route = | |||
This route does safer strats in the red coins area, and '''does not''' do the elevator BLJ. Overall, it's typically recommended that players attempt to learn the BLJ strat route since it can be made consistent with practice even for newer or intermediate players. | |||
{{#ev:youtube|iNbQQ4Rbf4o}} | |||
= Elevator BLJ Route = | |||
== Full Run Example== | |||
{{#ev:youtube|nxC1FMx2944}} | |||
See the walkthrough below for more details and options on each part. | |||
==Commentated Tutorial== | |||
This tutorial video by Tabascoth goes over a lot of the Expert and Advanced information presented below along with some additional information. However newer strats like Salt Bog and beginner strats are generally not included. | |||
{{#ev:youtube|y9kxO877D9o}} | |||
==Walkthrough== | |||
===Beginning=== | |||
Regardless of the route or strats you choose for this star, the first room will always be the same. Hold back and kick after killing the scuttlebugs to safely grab all 3 coins from each. To make sure you grab the entire row of 5 coins on the righthand ledge, wait to dive until '''after''' you grab the first coin in the row. | |||
*Make sure you enter the door to the Reds Room in lakitu C-Up and mash C-Right at the door in order to reduce lag, and to setup the cam for the beginning of the next area. | |||
<div><ul> | |||
<li style="display: inline-block; vertical-align: top;"> | |||
[[File:hmc100beginning.mp4|thumb| Standard Beginning Movement ([https://youtu.be/EihZT9gVd2c example w/ inputs])|class=autoplay]] | |||
</li> | |||
</ul></div> | |||
=== Red Coin Room Part 1=== | |||
As you enter the Reds Room, there are a few movement options to get over the red fence and onto the elevator. Pay attention to the input displays in each of the vids to understand what to hold for each strat. | |||
*If you didn't mash C-Right before entering the room, your camera may act differently here | |||
*If your goal is to make Early Spider Cycle, you need to land directly on the elevator from the wall kicks since rolling out onto the elevator costs too much time to make the cycle | |||
* The videos below press C-Down after the last wall kick. Alternatively, you can press C-Down as you perform the 2nd wallkick. Refer to Tabascoth's tutorial above. | |||
<div><ul> | |||
<li style="display: inline-block; vertical-align: top;"> | |||
[[File:hmc100rolloutelevator.mp4|thumb| Beginner - Rollout onto elevator |class=autoplay]] | |||
</li> | |||
<li style="display: inline-block; vertical-align: top;"> | |||
[[File:hmc100landonelevator.mp4|thumb|Intermediate - Single Jump wallkick, land on elevator ([https://youtu.be/EihZT9gVd2c?t=11 example w/ inputs]) |class=autoplay]] | |||
</li> | |||
<li style="display: inline-block; vertical-align: top;"> | |||
[[File:hmc100ljwkonelevator.mp4|thumb|Expert - Longjump wallkick, land on elevator |class=autoplay]] | |||
</li> | |||
</ul></div> | |||
After the first 2 red coins, there are a few movement options to choose from. For beginners and intermediate players, it's recommended that you ride the elevator to the 3rd red and longjump ledge-grab to the 4th red. For more advanced players, you can longjump from the elevator to the corkbox, and then longjump from the corkbox into the 3rd red, sliding off the black pillar to jump and wallkick to the 4th red. As mentioned above, if your beginning wasn't fast enough, the cycle of the spider after the 5th red will change the route slightly. | |||
*For the Beginner strat; | |||
**time your long jump to happen after the red coin shadow appears on the elevator | |||
**aim for the right side of the platform where the 4th red is to avoid any collision issues | |||
*Turning the camera with C-Lefts after the first 2 reds is important for console players as it reduces a lot of lag | |||
*If you make a mistake and can't catch up to the elevator, just wait for it to respawn | |||
*As you exit the Reds Room, be in lakitu cam C-Up and mash C-Right at the door to reduce lag | |||
[[File:Missed 4th red backup.gif|frame|right|Backup for missed 4th red coin which doesn't require riding the platform again. Pressing Z to squat allows you to buffer straight down for the start of the sideflip.]] | |||
<div><ul> | |||
<li style="display: inline-block; vertical-align: top;"> | |||
[[File:hmc100rideelevator.mp4|thumb|Beginner/Intermediate ([https://youtu.be/zdDvBPAHd0o?t=21 w/ inputs])|class=autoplay]] | |||
</li> | |||
<li style="display: inline-block; vertical-align: top;"> | |||
[[File:hmc100noearlyspider.mp4|thumb|Advanced |class=autoplay]] | |||
</li> | |||
<li style="display: inline-block; vertical-align: top;"> | |||
[[File:hmc100earlyspider.mp4|thumb|Expert (early spider cycle) |class=autoplay]] | |||
</li> | |||
<li style="display: inline-block; vertical-align: top;"> | |||
[[File:hmc100atlcamsljwk.mp4|thumb|Alternate Cameras for Intermediate and Expert ([https://youtu.be/EihZT9gVd2c?t=16 example w/ inputs])|class=autoplay]] | |||
</li> | |||
</ul></div> | |||
===Maze === | |||
The main variations for the maze section of the star come from the movement to enter the maze, and the movement near the blue coin switch. Slide-kicking into the hole is a little safer but costs a few frames. For the blue coin switch, you can longjump up to the platform to single-jump and groundpound the switch, or you can save some time by performing a dive rollout on the platform, and as you land on the switch, quickly sideflip and groundpound to reorient yourself towards the blue coins. | |||
*These videos begin with C-Right mashing for lag reduction which affects the camera as you go through the first door. | |||
<li style="display: inline-block; vertical-align: top;"> | |||
[[File:hmc100skintohole.mp4|thumb|Beginner/Intermediate ([https://youtu.be/EihZT9gVd2c?t=39 example w/ inputs])|class=autoplay]] | |||
</li> | |||
<li style="display: inline-block; vertical-align: top;"> | |||
[[File:hmc100diveintohole.mp4|thumb| Intermediate/Expert ([https://youtu.be/EihZT9gVd2c?t=48 example w/ inputs])|class=autoplay]] | |||
</li> | |||
===BLJ === | |||
{{#ev:youtube|x3Y-Vt9MIvM}} | |||
===After BLJ === | |||
After the BLJ, make your way back to the Red Coin room to finish the star. As an expert strat, you can skip the elevator room by triple jumping over the wall (Salt Bog strat). | |||
[[File:Elevator cam set up.gif|thumb|323x323px|To avoid bonking at the elevator, C-left buffer before the door, then move to the center of the elevator and stop once, and then go full left notch.]] | [[File:Elevator cam set up.gif|thumb|323x323px|To avoid bonking at the elevator, C-left buffer before the door, then move to the center of the elevator and stop once, and then go full left notch.]] | ||
<li style="display: inline-block; vertical-align: top;"> | |||
[[File:hmc100afterblj.mp4|thumb| Beginner/Intermediate ([https://youtu.be/EihZT9gVd2c?t=76 example w/ inputs])|class=autoplay]] | |||
</li> | |||
<li style="display: inline-block; vertical-align: top;"> | |||
[[File:hmc100saltbog.mp4|thumb|Expert (Salt Bog)|class=autoplay]] | |||
</li> | |||
== | === Salt Bog Setup === | ||
{{#ev:youtube|https://youtu.be/vMFUign5Svk}} | |||
===Red Coin Room Part 2=== | |||
There are 2 main variations when you re-enter the Red Coin room at the end of the star. The time difference for each strat is heavily dependent on where the blue coin from the eye falls which is based on RNG. Grabbing the red coin to the right first makes the blue coin spawn later, making it less likely that the coin will despawn if you make a mistake. However the drawback is that it's more difficult to react to the blue coin quickly for an optimal time. The video below shows the two routes side-by-side with good and bad blue coin RNG for reference. In terms of probability, 36900 / 65114 RNG values work (56.67%) in making the blue coin fall off the platform, and the coin will fall off directly towards the star about 2% of the time. | |||
{{#ev:youtube|YIc81HGRqjk}} | |||
{{#ev:youtube| | |||
=== | |||
{{#ev:youtube| | |||
{{RTA Guide Nav}} | {{RTA Guide Nav}} | ||
Latest revision as of 06:26, 26 January 2024
| HMC 100 Coins | |

| |
| Record Information | |
| RTA World Record | 1:56.56 (with Red Coins) |
| Single Star World Record | 1:31.87 |
Elevate for 8 Red Coins is the second mission of Hazy Maze Cave.
No BLJ Route
This route does safer strats in the red coins area, and does not do the elevator BLJ. Overall, it's typically recommended that players attempt to learn the BLJ strat route since it can be made consistent with practice even for newer or intermediate players.
Elevator BLJ Route
Full Run Example
See the walkthrough below for more details and options on each part.
Commentated Tutorial
This tutorial video by Tabascoth goes over a lot of the Expert and Advanced information presented below along with some additional information. However newer strats like Salt Bog and beginner strats are generally not included.
Walkthrough
Beginning
Regardless of the route or strats you choose for this star, the first room will always be the same. Hold back and kick after killing the scuttlebugs to safely grab all 3 coins from each. To make sure you grab the entire row of 5 coins on the righthand ledge, wait to dive until after you grab the first coin in the row.
- Make sure you enter the door to the Reds Room in lakitu C-Up and mash C-Right at the door in order to reduce lag, and to setup the cam for the beginning of the next area.
-
Standard Beginning Movement (example w/ inputs)
Red Coin Room Part 1
As you enter the Reds Room, there are a few movement options to get over the red fence and onto the elevator. Pay attention to the input displays in each of the vids to understand what to hold for each strat.
- If you didn't mash C-Right before entering the room, your camera may act differently here
- If your goal is to make Early Spider Cycle, you need to land directly on the elevator from the wall kicks since rolling out onto the elevator costs too much time to make the cycle
- The videos below press C-Down after the last wall kick. Alternatively, you can press C-Down as you perform the 2nd wallkick. Refer to Tabascoth's tutorial above.
-
Intermediate - Single Jump wallkick, land on elevator (example w/ inputs)
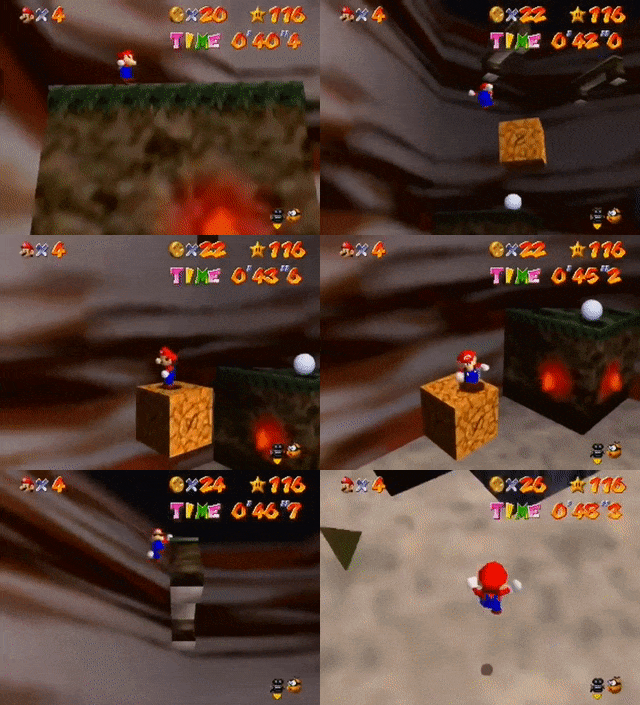
After the first 2 red coins, there are a few movement options to choose from. For beginners and intermediate players, it's recommended that you ride the elevator to the 3rd red and longjump ledge-grab to the 4th red. For more advanced players, you can longjump from the elevator to the corkbox, and then longjump from the corkbox into the 3rd red, sliding off the black pillar to jump and wallkick to the 4th red. As mentioned above, if your beginning wasn't fast enough, the cycle of the spider after the 5th red will change the route slightly.
- For the Beginner strat;
- time your long jump to happen after the red coin shadow appears on the elevator
- aim for the right side of the platform where the 4th red is to avoid any collision issues
- Turning the camera with C-Lefts after the first 2 reds is important for console players as it reduces a lot of lag
- If you make a mistake and can't catch up to the elevator, just wait for it to respawn
- As you exit the Reds Room, be in lakitu cam C-Up and mash C-Right at the door to reduce lag
-
Beginner/Intermediate (w/ inputs)
-
Alternate Cameras for Intermediate and Expert (example w/ inputs)
Maze
The main variations for the maze section of the star come from the movement to enter the maze, and the movement near the blue coin switch. Slide-kicking into the hole is a little safer but costs a few frames. For the blue coin switch, you can longjump up to the platform to single-jump and groundpound the switch, or you can save some time by performing a dive rollout on the platform, and as you land on the switch, quickly sideflip and groundpound to reorient yourself towards the blue coins.
- These videos begin with C-Right mashing for lag reduction which affects the camera as you go through the first door.
BLJ
After BLJ
After the BLJ, make your way back to the Red Coin room to finish the star. As an expert strat, you can skip the elevator room by triple jumping over the wall (Salt Bog strat).
Salt Bog Setup
Red Coin Room Part 2
There are 2 main variations when you re-enter the Red Coin room at the end of the star. The time difference for each strat is heavily dependent on where the blue coin from the eye falls which is based on RNG. Grabbing the red coin to the right first makes the blue coin spawn later, making it less likely that the coin will despawn if you make a mistake. However the drawback is that it's more difficult to react to the blue coin quickly for an optimal time. The video below shows the two routes side-by-side with good and bad blue coin RNG for reference. In terms of probability, 36900 / 65114 RNG values work (56.67%) in making the blue coin fall off the platform, and the coin will fall off directly towards the star about 2% of the time.
| |||||||||||||||||||||||||||||||||||||||||||||||||||||||||||||||||

