RTA Guide/Bowser in the Sky: Difference between revisions
Jump to navigation
Jump to search
(→Beginner (Pole): remove toas vid) |
(replaced some yt embeds with mp4s, touched up text/formatting) |
||
| Line 6: | Line 6: | ||
|throws_record=[https://www.youtube.com/watch?v=8PvdiGtw99s 37.07] | |throws_record=[https://www.youtube.com/watch?v=8PvdiGtw99s 37.07] | ||
}} | }} | ||
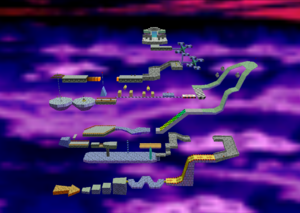
Bowser in the Sky is located | Bowser in the Sky is located at the top of the endless staircase behind the 70 star door. 70 stars are needed to access it without the use of a BLJ. | ||
== Reds == | == Reds == | ||
=== Beginner === | === Beginner === | ||
{{#ev:youtube|HpXndR_Ye1M}} | {{#ev:youtube|HpXndR_Ye1M}} | ||
= | <li style="display: inline-block; vertical-align: top;"> | ||
[[File:Bits reds alt ending.mp4|thumb| Alternate ending movement ([https://youtu.be/drNed4QiIhU example w/ inputs]) |class=autoplay]] | |||
</li> | |||
=== Advanced === | === Advanced === | ||
{{#ev:youtube|IajSeNb0Fys}} | {{#ev:youtube|IajSeNb0Fys}} | ||
====Invisible | ====Invisible Axle Position==== | ||
The visual | The hitboxes of the elevators' axles do not line up with their visual models; you may encounter issues with them if you're going for early cycle or miss four cycles. These clips show the hitboxes' actual locations. | ||
{{#ev:youtube|HuTwKkhpGoQ}} | {{#ev:youtube|HuTwKkhpGoQ}} | ||
{{#ev:youtube|9b05ZhSsKdQ}} | {{#ev:youtube|9b05ZhSsKdQ}} | ||
== No Reds == | |||
==No Reds == | |||
===Beginner (Pole)=== | ===Beginner (Pole)=== | ||
{{#ev:youtube|bFEkarSrobE}} | {{#ev:youtube|bFEkarSrobE}} | ||
===Intermediate=== | ===Intermediate=== | ||
[[File:Bits standing tjwk punch.mp4|thumb|Punch, jump while neutral | [[File:Bits standing tjwk punch.mp4|thumb|Punch, jump while the stick is neutral, hold up after the double jump, switch to up-left after the triple jump, then rotate the stick to the right notch after the wallkick to ledgegrab|class=autoplay]] | ||
{{#ev:youtube|3cTtu0fiMzA}} | {{#ev:youtube|3cTtu0fiMzA}} | ||
===Advanced=== | ===Advanced=== | ||
| Line 35: | Line 33: | ||
===Manamo Cycle=== | ===Manamo Cycle=== | ||
{{#ev:youtube|761Y9WE_wzk}} | {{#ev:youtube|761Y9WE_wzk}} | ||
= | <li style="display: inline-block; vertical-align: top;"> | ||
[[File:Bits manamo ljwk.mp4|thumb| Alternate longjump wallkick strat ([https://youtu.be/3vBZgb69O_s example w/ inputs]) |class=autoplay]] | |||
</li> | |||
<li style="display: inline-block; vertical-align: top;"> | |||
[[File:Bits ultimate ending.mp4|thumb| Faster "Ultimate" ending ([https://youtu.be/Yw2PqNnln5Q example w/ inputs]) |class=autoplay]] | |||
</li> | |||
==="TAS" LJ=== | ==="TAS" LJ=== | ||
This movement is one elevator cycle faster than Manamo cycle. | This movement is one elevator cycle faster than Manamo cycle. | ||
====Tutorial==== | ====Tutorial==== | ||
{{#ev:youtube|fmJCWHs36P4}} | {{#ev:youtube|fmJCWHs36P4}} | ||
===Comparison=== | ====Comparison==== | ||
{{#ev:youtube|sHNOa79i-kI}} | {{#ev:youtube|sHNOa79i-kI}} | ||
==Bowser Throws == | ==Bowser Throws == | ||
Revision as of 02:06, 1 April 2022
| Bowser in the Sky | |

| |
| Record Information | |
| RTA World Record | 37.16 (Course) / 1:02.66 (with Red Coins) |
| Single Star World Record | 35.73 (Course) / 1:02.19 (with Red Coins) |
| Bowser Throws World Record | 37.07 |
Bowser in the Sky is located at the top of the endless staircase behind the 70 star door. 70 stars are needed to access it without the use of a BLJ.
Reds
Beginner
Alternate ending movement (example w/ inputs)
Advanced
Invisible Axle Position
The hitboxes of the elevators' axles do not line up with their visual models; you may encounter issues with them if you're going for early cycle or miss four cycles. These clips show the hitboxes' actual locations.
No Reds
Beginner (Pole)
Intermediate
Advanced
Expert
Manamo Cycle
Alternate longjump wallkick strat (example w/ inputs)
Faster "Ultimate" ending (example w/ inputs)
"TAS" LJ
This movement is one elevator cycle faster than Manamo cycle.
Tutorial
Comparison
Bowser Throws
Tutorial
Bomb Order 1
Bomb Order 2
| |||||||||||||||||||||||||||||||||||||||||||||||||||||||||||||||||